Saturday, December 27, 2008

What Ron's PSP has to Offer


Christmas has just pasted and i got a PSP. This is a neat piece of art right here! This is some of its features

Settings: USB Connection-This PSP is very easy to use, its just drag and drop                       and thats all!
                 Connected Display Settings- This is a very cool feature. If you have the                                                                   wires you could plug it into you TV and                                                                       se your TV as a screen.


Photo: Camera-Here you Plug in you camera in the USB plug in on the top of the             PSP and shoot with you PSP.

            (Photo) Memory Stick ™-You can store photos here.

Music: (Music) Memory  Stick ™-You can store music here.

Video: (Video) Memory  Stick ™- You can store videos as big as movies here.

Game: Game Sharing-Here you can share games with other PSP users out there.

            (Game) Memory  Stick ™-Here you store games like GTA, Tony Hawk,                                                              Medal of honor and a whole lot of other games.

Network: LocationFree™ Player-This feature is like a radio except you buy                                                                   stations.

                Skype™-This is a program that allows you to call people around the                                      world for just cents! But if you call a member of Skpe its free!

               Internet Radio-You can listen to radio stations based online.

               Internet Browser-Yes! This is what you think! you can surf the web on                                                this PSP!

In my opinion don't buy the PSP slim.

Tuesday, September 30, 2008

Ron's Mission GTA: Operation 2: The Trip


My family is going to a mall far from our house. I decided not to go because I was napping and they woke me up in the middle of the day to go and I just didn't feel like it. I then remembered that there was a very good game shop there and I asked my dad if he could get any GTA for me and he said he'll look for it. They left me was alone with my dog, which is a very cute one year old pug.... Anyway, they were out for a very long time. They left at 2 PM and it was very exciting. They were gone for about 9 hours. They brought home some take out and a lot of stuff they bought. I was looking for the game. I couldn't find it. I asked my dad where it was and he had it in his hand and I was really happy. The only worry know was if it was going to work, and guess what, it did. I also got another game from Rockstar and it was called Bully. The cool thing about it was, it was the sequel to the first Bully. I spent longs nights of the game and so the Operation was a success!

Saturday, September 27, 2008

Ron's Mission GTA: Operation 1: The Meeting


I've been craving GTA allot for some reason and I really want to play it on PC or PS2. I really want to play GTA Vice City. I was on Yahoo! Messenger the other night with one of my friends, Charlie. Charlie had the latest Games with PC, PSP, PS2, PS3, X Box and a whole lot more. I asked him if he could get me the game and he said he could but I had to meet him. He told me to go to the local park at six AM. I asked him at six and he said that he had volleyball practice there and I said I’d be there. Now the park was out of the boundaries of where I’m aloud to go. I asked my Dad if I could go and he said I could without realizing he was being sarcastic. I couldn't wake up at six so I had to stay up all night. Then it was about 5:30 AM. I took a shower and left. I went to the bus stop with my skateboard and waited and I was lucky that there first trip was 5:45 AM. I got on the bus then left. I was finally at the bus station right next to the park. It was six and I was there at where he told me to go. I waited and waited and waited. It was 7:00 Am and he still wasn't there but I did see the rest of the volleyball team. I gave up and went back to the bus station. I waited for a bus for and hour and then it was 8:00 AM. I then say my Dad not happy to see me, I went home and the mission was a failure. I then get back on with Charlie on Yahoo! Messenger and he said at the last minute his Mom wouldn't let him go.

Thursday, September 18, 2008

Ron's Dad and Jay Leno


Amazing isn't it? this picture was taken in 1987 during Spring Break and my dad met some famous people there and i thought getting a picture with Jay leno unbelievable. Jay really looks young in this picture and this was before he hosted the
"Tonight Show" and when i first saw this picture he is now retiring, weird huh? 

Tuesday, September 16, 2008

Ron's How To: 3D Glasses


I am a fan of the Internet show Indymogul and a few months ago they were giving out free 3D glasses, about a hundred of them and i was very excited to get one. After a month i didn't get anything. I wasn't happy and i started to get very interested in 3D graphics and video. i've been trying to create my own 3D glasses for about 2 months now and i have done it!

First what you need is...

A Box Cutter


Cyan Clear Plastic


Red Clear Plastic


Cardboard


"Glue"


A Ruler

A Paint Brush

Scissors 
Ok here is what to do...

Step 1
Design and draw your glasses' template on the cardboard... 


Step 2
Now cut your glasses out using the box cutter and also cut out where the lenses will be...


Step 3
Now cut out your cyan and red plastic, just estimate the shape we'll cut out the the rest later... 


Step 4
Now cut out just a little of cardboard...


Now add some glue...


Take your brush and put it into the glue...


Add the glue on the glasses...


Then place the cyan and red plastic...


It should look like this...


Monday, September 15, 2008

Ron's How To: 3D Cards

Are you tired of giving boring cards you bought? Well why don't you make a 3D CARD!

(If your gonna make a 3D card you can't make one without 3D Glasses! Here is a video on how to make 3D glasses with only using only a red and blue marker, clear plastic and a some old glasses.)


Using Your Glasses

Whether you've seen my other video on how to make 3-D pictures using any digital camera, or you have an old magazine or comic book with 3-D images, but you've lost those red and blue glasses. I'll show you a quick and easy way to make your own.

Step 2:

What You Will Need

All you need are a cheap pair of plastic sunglasses, like these that came free with the Kid's Meal, a red and blue permanent magic marker, and any clear piece of flat plastic, like this transparency sheet.

Step 3:

Making Your Glasses

Use the old lenses as a template. Simply cut them out along the inside edge of the line, and then color them with the red and blue markers. Now simply pop our new colored lenses back into the frames. The blue will cover the right eye, and the red will cover the left. That's it! You’re done. Don't hesitate to ask if you have any questions or comments. I'm glad to help. Thanks for watching.

And if this doesn't work you can check out this.
These are the programs that you will need:
Microsoft Publisher-Download free here!
Stereo Photo Maker-Download here!
Before starting this tutorial you should watch this video...

Make 3D Pictures From Any Digital Camera! - Click here for more blooper videos

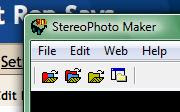
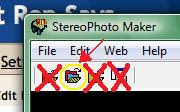
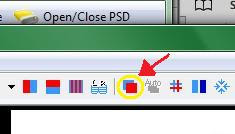
If you have opened SPM i have my own kind of method on how to make your own 3D photos. First click on " Open Left and Right Image"...


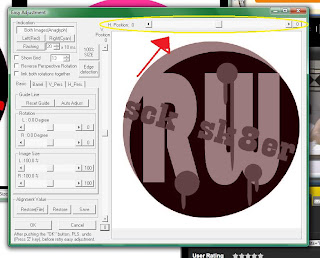
Then open the two images and click on "Easy Adjustment"...


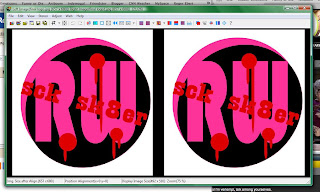
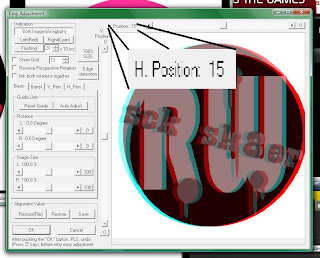
Now adjust the "H. Position: #" ONLY!!!


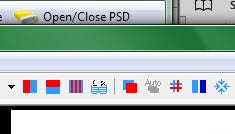
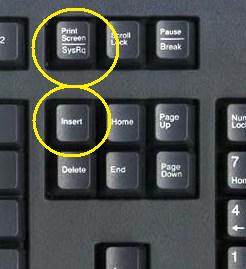
Now when you think it looks right this is where my method kicks in. On your keyboard i need you to hit the,
 
Here it is on the actual keyboard

When you hit these keys you copy the whole screen, know what you gotta do is open Paint and and paste it on and save it, like this...

Then open Publisher and design your card...


Then print it and your DONE!

Ron's Video of the Week: Kung Phooey


OUCH!

Monday, June 23, 2008

A Day and a Life of Ron: Nocturnal Ron


Have you ever had a thing during the summer when you one night stay up all night and sleep all day and you can't stop yourself from sleeping cause you can’t stay up all day but instead you sleep. You see where I’m going here? For the last three days, it’s almost like I’m a nocturnal animal or something. My plan today is to stay up all night and stay up all day and go to sleep at about 7:00 and here in Subic the sun goes down at about 6:00 PM. I’ve tried it before but I couldn’t stay up. I tried to break it the next day but again couldn’t stay up because I laid down on our couch and posted a sign on the wall saying “Up in 30”. But I woke up about six hour’s later. I went to sleep at about nine in the morning and woke up at about two o’clock in the afternoon. So know I feel very confident today even though I felt like this the last three days.  While I type this down it is about five thirty. And exactly when I type this sentence down it is know 5:43. It really is very hard because while you try to stay up all you thing about is going under those comfy covers and close your eyes and rest for hours and hours. There was another plan to force your self to sleep early.  In Subic housing here almost all the houses have an A.C. circulation and turns of and on by itself and during the day when the house is busy you don’t notice at all but when staying up all alone at night when it’s very quiet you here everything. As I finish this sentence it is now 5:52 and really sleepy.     


Tuesday, June 17, 2008

Ron's How To: Ron's DIY Fathers Day Card


Are you stuck on what to do for father’s day? Are you low on cash? And you don't want to give a normal, average, simple card? Are you tired of me asking you hypothetical questions? Well make one of my own great, cheap, meaningful, and good looking father’s day cards.


What you need...


Allot of Paper


Glue


A Permanent Marker


Scissors
 

And a Folder

Step 1

First, cut out small rectangles. About maybe 20 to 25 pieces of small rectangular pieces of paper. This will act as miniature bills or contracts on your card.

Step 2 

Second, label your pieces of paper as bills or contracts or anything that has to with what fathers have to deal with.

Step 3

Third, with your folder cut out a card.

Step 4

Forth, write what you want in your card. I put on one side "Take a BREAK!" and on the other side, "Thank you Dad!!!" then my signature.

Step 5 

Fifth, put on strips of glue on the outside of the card.

Step 6 

Sixth, is to stick on your bills and contracts onto your card.

Step 7

Seventh, cut out a small piece of paper that will act as a label that says from and to.

Step 8

Eighth, write who it is from and who is it's to.

Step 9

Ninth, the final step is to stick on your label and your done!